Tutorials Index Hex Edited Reskin
Using Hex Editing to Reskin a Model v1.0
A pretty simple method for reskinning objects, I havent seen a tutorial for one around so
here is one. What you will need :
- The model you want to reskin
- Your new skin
- A hex editor ( Find a decent one here )
- Thats it
So youve got your new skin for a model, but you can only use it to replace an existing
models skin? How troublesome. You could import the model to renx and reskin it that way, but
what if you dont have a decent enough connection to get gmax? You could do this :
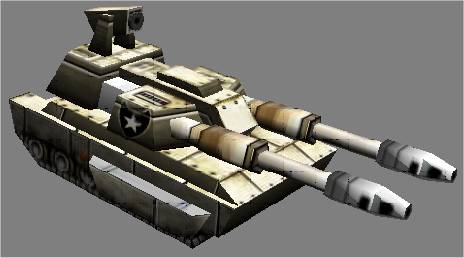
Make a copy of the model you want to reskin, give it a different name too ( Ive chosen to
reskin ChrisV80s advanced paladin model, its the only one I have available at the moment )
So youve renamed it from AvAdvPaladin.w3d to AvNewPaladin.w3d? Good lad. Now open your hex
editor and open AvNewPaladin.w3d.
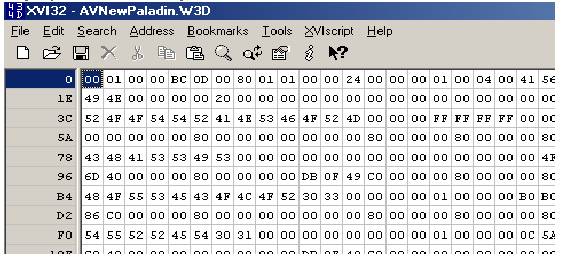
Looks confusing? It isnt really though, just think of it as each pair of digits on the left
side directly relates to the digit on the right side, so 52 = R. Simple yeah? Good. Now the
renamed model still looks for AvPaladin.tga, which is the part we want to change. So we
change AvPaladin.tga to our new skins name. However, the new name must be as long as the old
name, so if your new skin is called Skin.tga, you will have to call it Skinxxxxx.tga (or
similar ) so that it has the same amount of digits. So, search for every reference to
AvPaladin.tga and change it! There will be about 4 or 5 references to the skin, change
them all. Next, save your work.
Now, open up your new model with w3dviewer ( make sure the textures are in the same
directory as the model ). You should see your new skin on the old model :
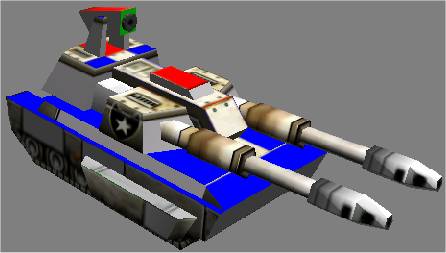
Ignore the skin quality please; its only for demonstration. Anyway, youve just followed
an easy tutorial, now go reskin more stuff.
I think thats everything.
TylerD
|